How to Create a YouTube Channel: Step-by-Step TUTORIAL
I’ve had many people reach out and ask HOW to actually create a YouTube channel, so when my friend, Caleb, told me he wanted to start a channel, I jumped at the opportunity to share the process here on the blog.
Here’s a step-by-step tutorial on how to create a YouTube channel from scratch. Let’s get started!
If you don’t already have a Gmail address, I’d recommend you start by creating one. It will help the YouTube channel creation process go more smoothly.
1. Sign in to YouTube

You first want to click the “Sign In” button at the top right-hand corner of the site.
2. Create an Official Channel
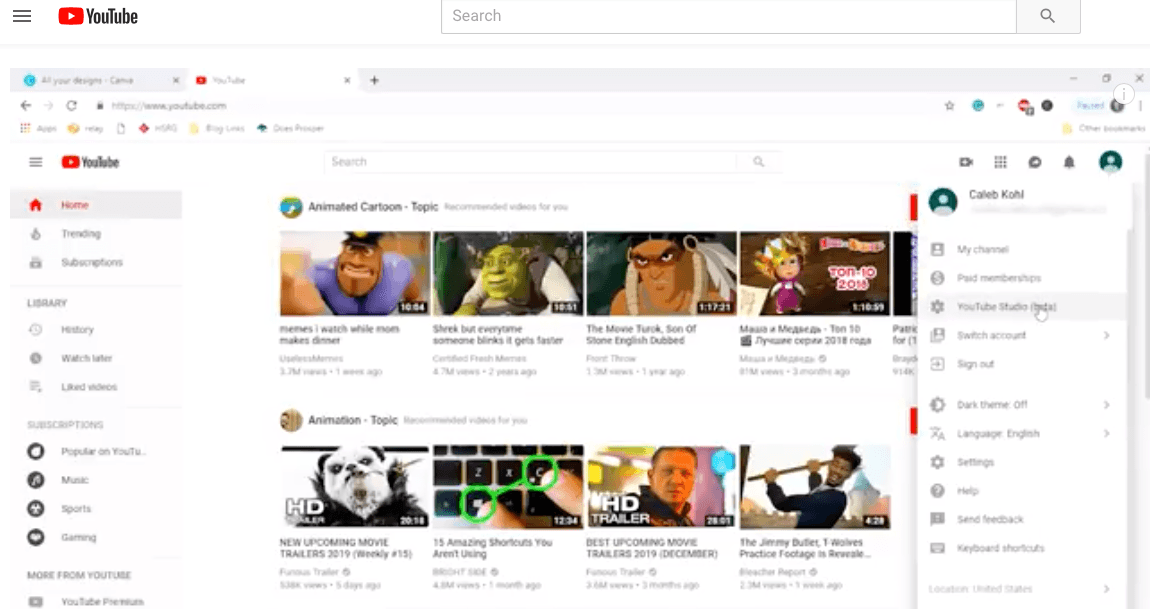
Next, click on the icon at the top right-hand corner (or where your profile picture would be if it’s already created).
Now click on the third option “YouTube Studio (beta).”
This will open a window that allows you to name your YouTube Channel.
You can either choose your name or create a different name. When you’ve chosen a name click “Create Channel.”

3. Create and Upload Banner
Now that your channel is created, it’s time to make it look professional and attractive. Don’t skip over these steps, because if you’re going to spend time making videos, you want your channel’s appearance to really represent the right image.
First, customize your channel banner (also known as “channel art”) by clicking “Customize Channel.” If you’ve never created a banner before you can use a free software such as Canva. to do so very easily. In Canva you’ll find the templates to create your banner as well as the specific dimensions that are needed.

Once you have the banner created, click the banner section for your channel and it will prompt you to upload your new customized banner to the page.
4. Add Description in your channel’s “About” section
The next step in customizing your channel is adding information in the “About” tab. In this section, you can tell viewers what your channel is about so they can better understand and decide if they want to subscribe!
Click the “About” tab. Then click on “channel description.” Once you’re done click “Save.”

Click the “About” tab.
Then click on “channel description.”
Once you’re done click “Save.”
5. Add Profile Picture
The final step in creating your channel is to add a profile picture. It’s important to have a picture of yourself in this section instead of a logo because people gravitate toward channels where they can see the person. Make sure your profile picture image is clear.
Usually, the profile picture of your channel will automatically be the same picture that is on your Google account. When you click the “edit” button on your YouTube profile, it will likely redirect you to your Google account. If this happens, just click “Upload Picture” to change your Google account profile. Refresh the page to see the changes made.

Please note that sometimes when updating your profile picture, it can take YouTube a couple of days to recognize the change, especially on the back end of your channel.
So, if you have this issue, don’t worry. It’s totally normal!
There you have it – the five simple steps to create your YouTube channel! Now the real work begins — creating your videos!
I created a FREE Channel Launch Checklist to get your YouTube channel off on the best foot! Inside are the 24 steps that will get your channel launched successfully! Click HERE to download!
3 Secrets to Reach 1,000 Subscribers and Get Monetized in Just 3 Months

Do you want to learn more about how to reach 1,000 subscribers and get monetized?
Join me in my free YouTube training where I walk you through the most important factor for racking up watch hours as quickly as possible and how to maximize every view that finds your channel.