What I Did to Improve My Videos: How to Level Up on YouTube and Look Like a Pro
Standing out on YouTube can be extremely difficult. Most new channels (52%!) never even surpass the 100-subscriber mark.

I started my second channel just a few years later – when YouTube was even more competitive and saturated – and I’ve been able to grow it to more than 500,000 subscribers! What was the difference-maker??
How did I improve my videos to be visually appealing and catch more viewers’ attention?
One of the main differences between my first and second channels was that, in the latter channel, I committed to make each video better than the last, and the quality continued to improve over time. Can you use those same techniques I learned to grow your audience now?
YES! The techniques are timeless, and if you work them right, they can work for you as well.
Learn from others and look for ways to improve
I enjoy the learning process, and I like to study what techniques are working for others. When I see videos with viral views, I study them to understand what techniques the creators used and how they captivated their audience with visually appealing video.
Now, I’m not advocating copying what others do, but you can learn great information to up-level your own content, test new features, and improve the videos you are already creating.
Don’t be afraid to re-watch your own videos and study those as well. I know it’s sometimes hard to watch yourself on the screen, but it’s valuable information you’re leaving on the table if you don’t critique your own content. Take each video and grow from it. I promise this simple tip will pay off in the long run.
3 Keys to Improving Video Quality
Looking back, I recognize three key factors that contributed to creating quality videos that my viewers enjoy. These elements include upgrades to my gear, changing my content planning process, and understanding the filming process even more. Overall, these keys also helped me improve my confidence on camera.
#1 – Ways to upgrade your video equipment
Early on, my gear held me back. It wasn’t that I needed to buy all the fancy and expensive equipment, but I wasn’t even taking full advantage of the gear I had.
Improve your sound quality
Listening back to my older videos, I realized they had quite an echo, so I worked to fix that problem immediately. An echo keeps videos from sounding professional, and it’s annoying for viewers as they watch.
One of the first pieces of equipment I changed was my microphone. I transitioned to a simple Rode micro video microphone that sat on my camera, and now I upgraded to a Rode video mic on a boom stand. Having this overhead microphone improved the sound quality even more!
Another thing I did was to add more soft items to my set to absorb sound. Sound can bounce off hard surfaces and create echoes. For example, think about how echo-y large gymnasiums are. This is because each has a wide-open space with hard surfaces surrounding it. There aren’t any soft surfaces or items blocking the echo.
To accomplish the sound absorption in my smaller room, I brought in a large rug for the floor, and I added a few chairs with blanket coverings. Especially when first starting out, it’s completely okay to work with items you already have!
Here are a couple of my own videos as examples for you to HEAR the differences in AUDIO QUALITY:
Old video with echo: How to get started as a freelancer
New video improved: Business planning deep dive (part 1)’
Improve your lighting
My old videos lacked any luster. I noticed that my background was quite dark, and there wasn’t a noticeable depth perception to offer viewers.
1. Use a ring light
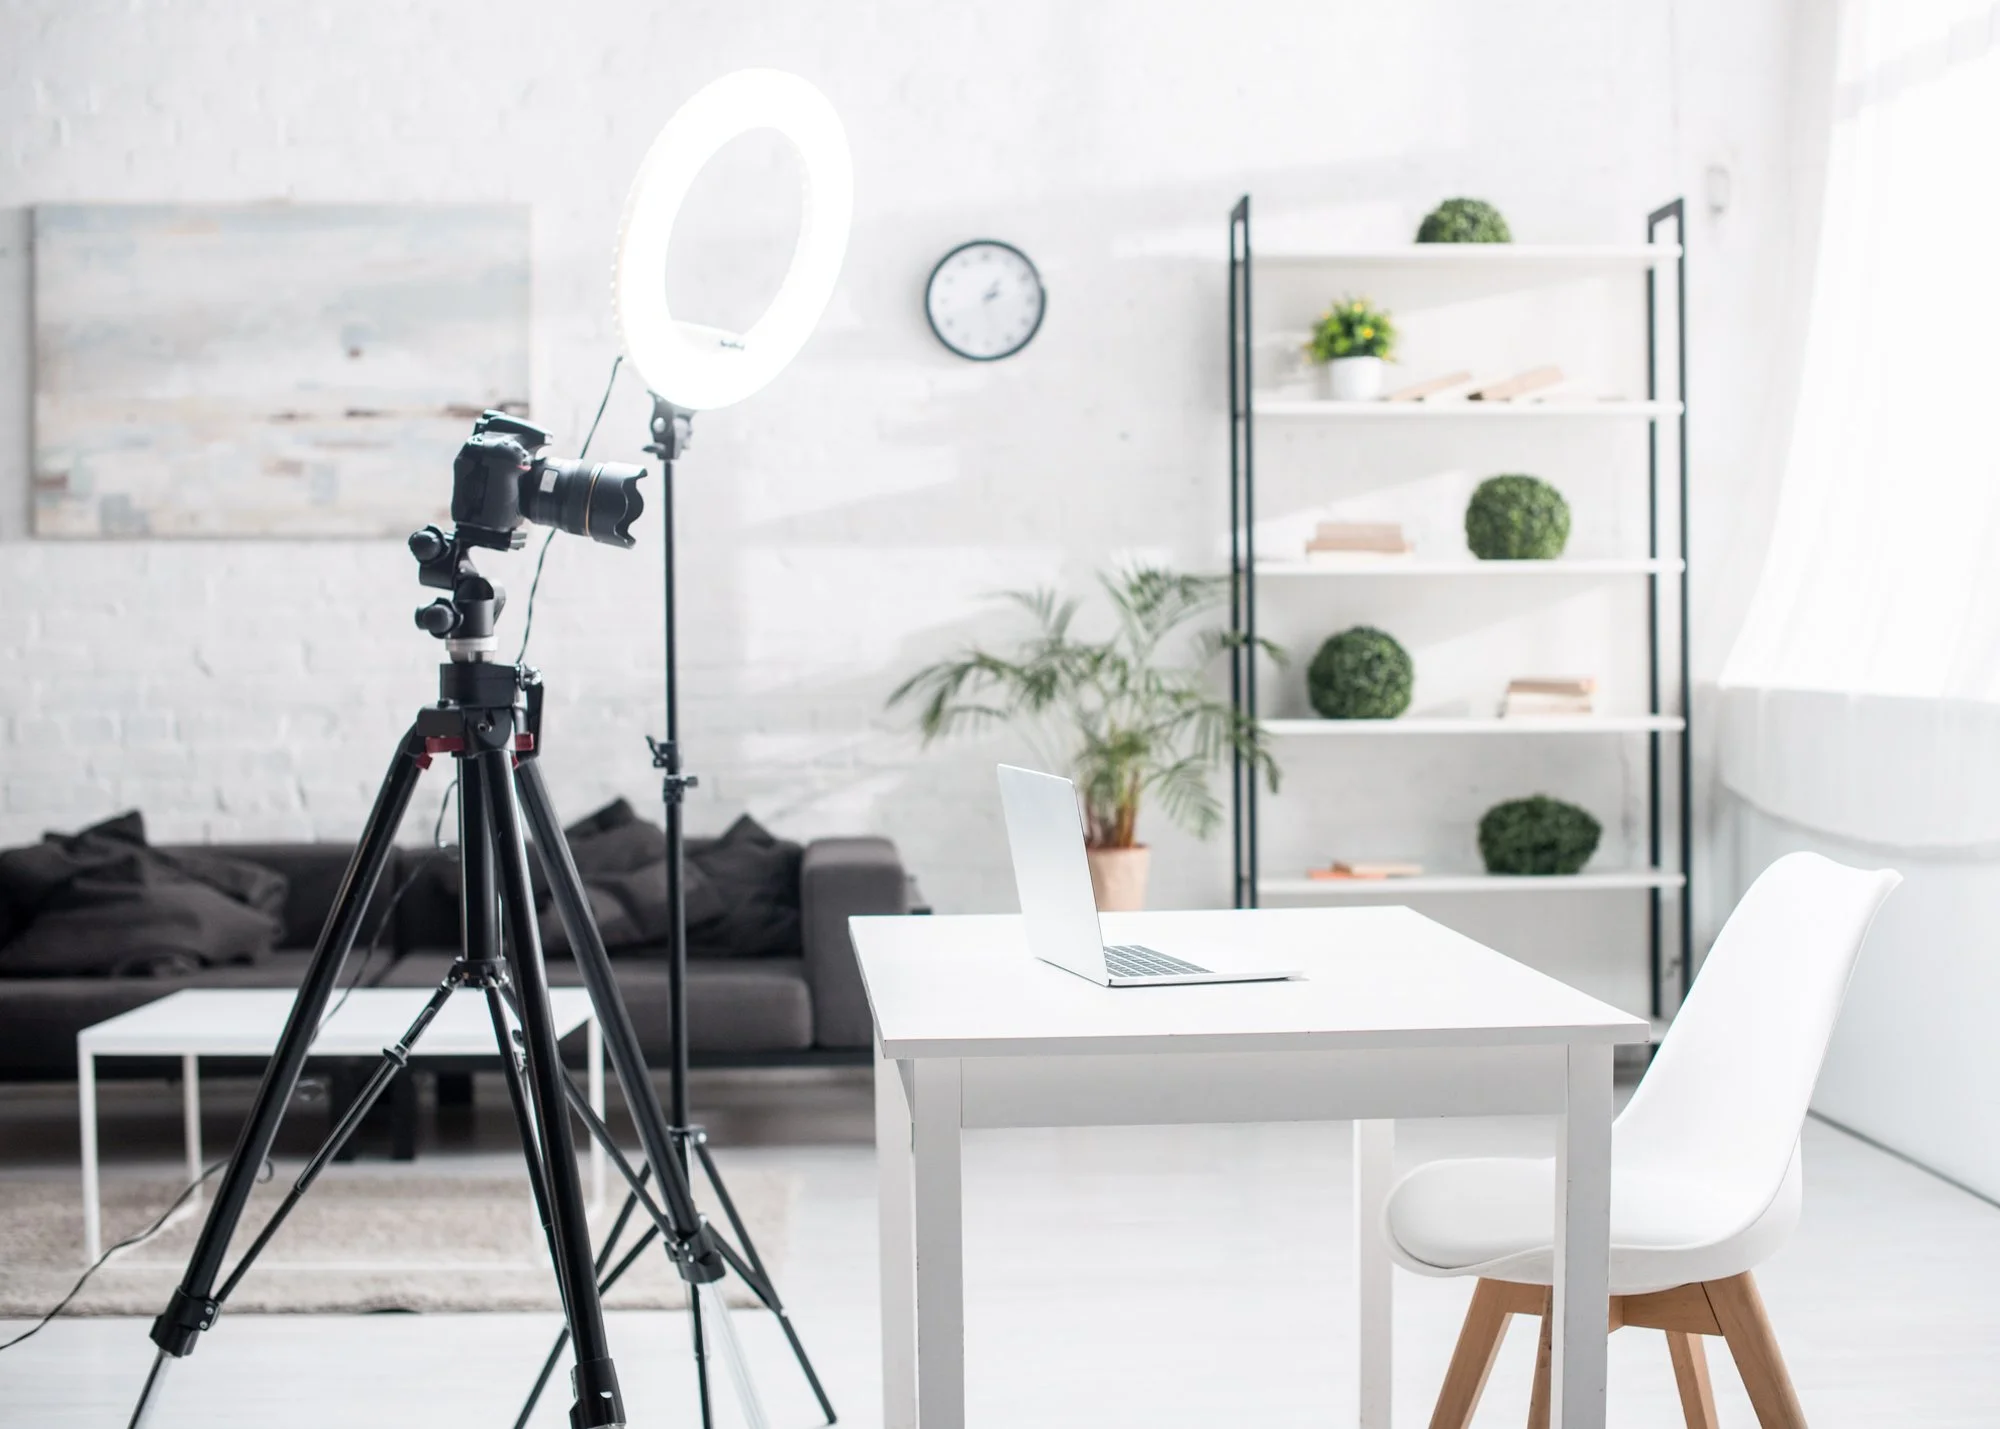
To fix this issue, I bought a ring light, which at the time was a large investment! Nowadays, you can buy the same ring light for a fraction of the cost. A ring light is a great way to evenly illuminate your faceand create beautiful lighting on the main focus of your video.
Ring lights can be harsh at times and create shadows or, even worse, create weird-looking circles on your eyes, so I learned the importance of diffusing the light source. Through diffusion, light is spread from the light source in a way that helps reduce any distracting glares or shadows.
Initially, I just threw a sheet over the ring light, and that worked great! The sheet did tend to slide off while filming, though, so eventually I replaced that sheet with an umbrella, and now I use a soft box.
2. Light your background
If you go back and watch some of my older videos, you’ll notice that the background in my videos was quite dark. This wasn’t because I wanted it that way. I just didn’t know how to light my background properly.
To fix this, I added a few lamps into the background. The trickiest part is avoiding shadows. Again, diffusion is key here!
3. Step away from the wall
Adding more depth to your shot will make your space look higher-end and your videos more professional. And your viewers won’t feel claustrophobic! As long as you diffuse your background light as we talked about above, you won’t need to worry about shadows this could create. Remember, the more depth you have in the video, the better it will look AND the more likely your viewers will stick around to watch.
Here are a couple of my own videos as examples for you to SEE the differences in LIGHTING QUALITY:
Old video with dark background: Affordable DIY filming setup for YouTube videos
New video improved: My YouTube filming and equipment setup
#2 – Improve your content planning process
If I had to pick one thing that’s made the biggest impact on my videos itself, it’s PLANNING my videos! Creating a solid plan has made all the difference. As I changed and improved my planning process, I saw a direct effect on my videos getting seen AND watched.

I plan three different parts of each video:
The content
The visual aspect
The graphics.
In order to plan effectively, I’ve created a spreadsheet with three columns – each are assigned to one of the three different parts of my video. I write out an outline for the content I want to share (column 1), I add in any b-roll or visual changes I want to make (column 2), and I incorporate graphics to illustrate my overall message (column 3).
No matter how you decide to set it up, make sure you create a solid plan in a way that will work for you.
Do you remember “show and tell” from grade school? You had the opportunity to bring in your favorite stuffed animal or toy and share it with the class? Well, a picture says 1,000 words, as the famous saying goes, and it’s no different when it comes to YouTube. It’s important as a video creator to SHOW your message and not just tell it.
Videos that show, not just tell gain the edge because they are more powerful and interesting to watch. A great way to show your message is to incorporate more b-roll and graphics to help guide your viewers’ experience.
#3 – Understand the filming process
You’ve just learned how to optimize your audio and lighting, now it comes down to the actual filming!

Change it up
I used to be a talking head in all my videos, sitting in one spot the entire time, in one continuous shot.
But how boring is that?
I’m working to play around with different variations to keep my videos interesting.
As I began changing this up, I also realized my watch time increased too. Viewers want the different transitions, whether it’s zooming in and out on a talking head, or adding graphics and b-roll for added depth.
Add b-roll
Initially, when I filmed b-roll, I would film multiple actions at the same time or pan from one thing to another, rather than focusing on one idea. I’ve learned that in order to keep the viewers’ attention, it’s better to have one action or one idea in each shot. This will make the viewers’ experience much more pleasant.
Optimize your camera settings
Camera settings intimidated me for a LONG time! Moving the lighting around was a great first step, but when I finally switched my camera from automatic to manual mode (it took at least a year and a half before I did), it made all the difference.

I can now more easily film my videos because, if my lighting seems off, sometimes I just need to adjust my camera rather than adjusting the full equipment setup.
This is a HUGE time saver!
Four camera settings you NEED to know to use manual mode:
Shutter speed – This setting needs to be twice whatever your frame rate is (i.e. if your frame rate is 30 frames per second (this is standard), then your shutter speed needs to be 60 frames per second). Once you set this, you can forget it!
Aperture – This setting is also known as f-stop, and it controls how wide open your lens is and (therefore) how much light is let into the camera. Changing your aperture is going to control the depth of focus. If your aperture is wide (lower f-stop), your shots will be brighter and your background more blurry and appear further away. If your aperture is narrow (higher f-stop), your shots will have less light coming in, and the background will be more in focus, which can make it feel closer to you. You want to change your aperture based on how you want your background to look in the video and how much light you need.
ISO – The ISO setting affects the brightness of a picture and controls how sensitive the sensor is to light. The higher the ISO number, the brighter your photos will be. Most cameras start at 100 and go up to about 32,000 (or higher). Your shots will look best if you keep the ISO as low as possible, so it’s best to get as much light from opening up your aperture as possible. As far as the ISO setting goes, just start at 100 and increase as needed.
White balance – Most cameras have an automatic white balance setting, so you can try that first. If the picture isn’t looking quite right (too yellow or too blue), then you’ll need to adjust this. The Kelvin number is based on the temperature (how warm or cool) of the picture, and you can fine tune this however you’d like. The goal here is typically to make white object and bright light look truly white.

If your videos don’t look quite how you want, learn these basic manual settings so you can play with them and get the picture to look how you desire.
Improving my video quality helped me to level up my YouTube game and grow my channel a LOT faster. I learned from others’ videos and looked for ways to improve my own. I upgraded my equipment and focused on audio and lighting quality. I set my stage by understanding my camera and a few key settings. You can take all of these simple keys and implement them into your own video creation!
3 Secrets to Reach 1,000 Subscribers and Get Monetized in Just 3 Months

Do you want to learn more about how to reach 1,000 subscribers and get monetized?
Join me in my free YouTube training where I walk you through the most important factor for racking up watch hours as quickly as possible and how to maximize every view that finds your channel.